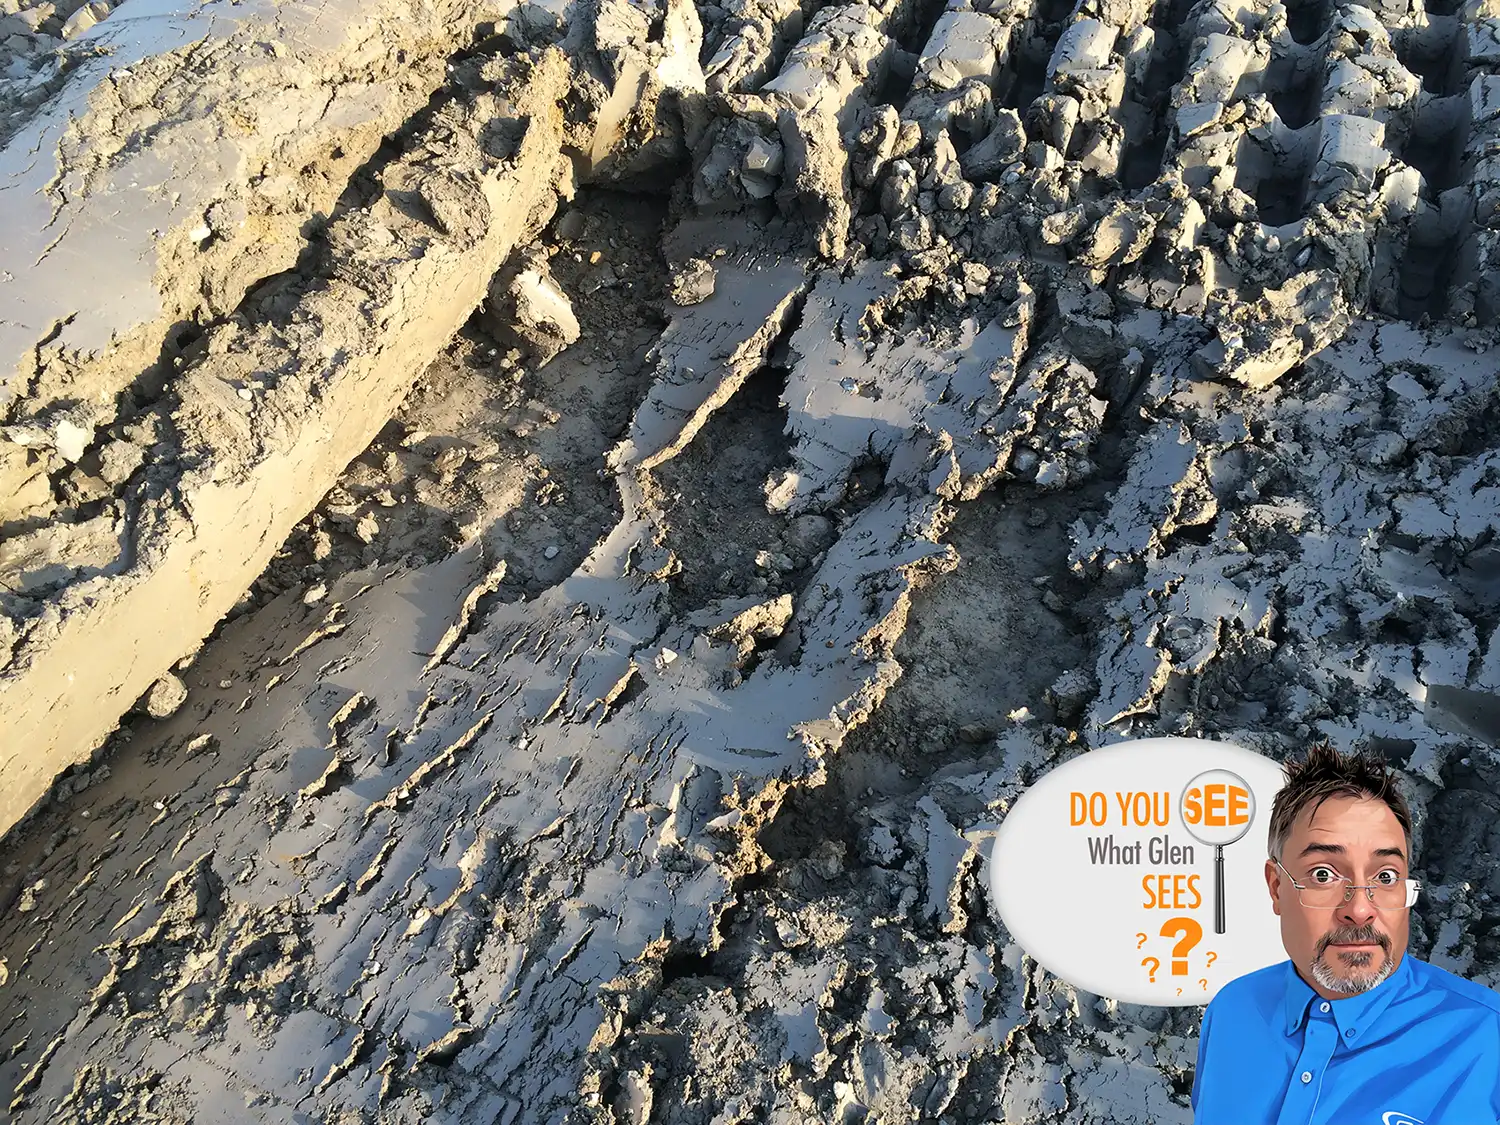
First, the answer to Vol. 16 (last week).
Thanks to those of you who either viewed and/or participated in this post! In this photograph, I was looking for the lack of bonding between the compacted lifts. You can clearly see that the upper lift of soil is peeling up from underlying lift. You can also see that this clay probably has a higher moisture content than that of the lift below, as indicated by the compactor imprints at the top of the photo.
Would you take a moisture/density test here? I would refuse to test if the specifications called for lift bonding such as is typical in a compacted clay liner specification. Why? Because I probably could get a passing test in that location with a nuclear gauge, but the specification isn’t met – if the contractor sees the test passed, you’re in for one heck of an argument, and one some engineers are reluctant to fight!
Calculated strictly on the permeability of 1 x 10⁻⁷ cm/s at 24 inches, 19.3 years for liquid to make it all the way through. If the clay liner is left in the condition shown in the photograph, it’s likely much quicker due to poorly bonded soil, now with the ability of liquid and gas to expand quicker laterally as well due to the poor bonding.
In these blog posts, Do You See What Glen Sees, I will present a photograph or short video related to earthwork or geosynthetics construction and have you identify the significance of what you’re seeing.
It could be things being done correctly or incorrectly. Primarily, these will be things that impact quality.
In addition to my blog, I’ll post this content on X and LinkedIn. You can post your response on one of those two.
I’ll give you my thoughts on each photo or video when I post the next installment.
Do you see what I see? Or did you find something I missed? I’m excited to find out!

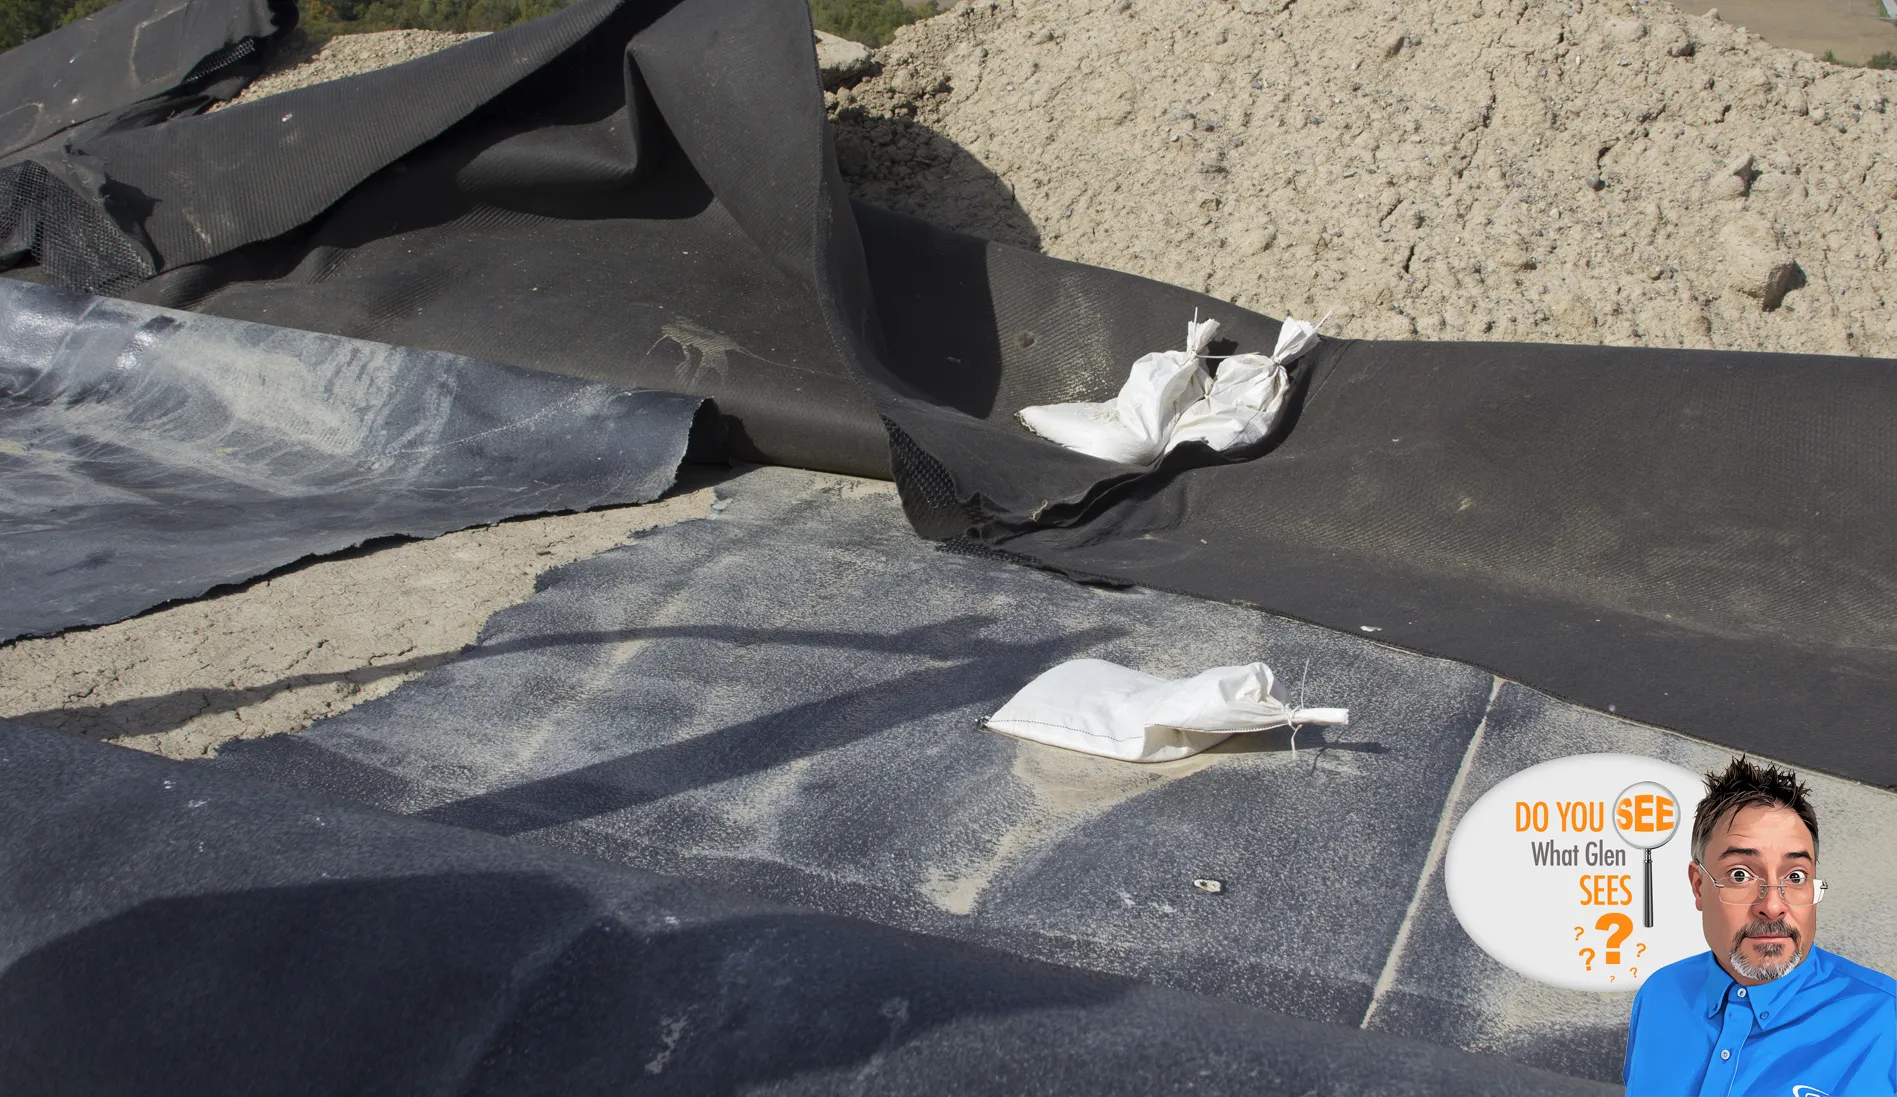
Here is the next installment. Take a good look. Do You See What Glen Sees?
Thank you for joining me for the 17th volume of Do You See What Glen Sees!
For reference for this photograph, it was taken on a cap project. The geomembrane in the foreground was existing material we were tying new geomembrane into, and same with the geocomposite. The pile of soil in the background is cover soil staged for placement from the prior construction season as well as spoils from excavating to expose the existing geomembrane.
Let me know what you see!
Post your response on X or LinkedIn.