First, the answer to Vol. 18 (last week).
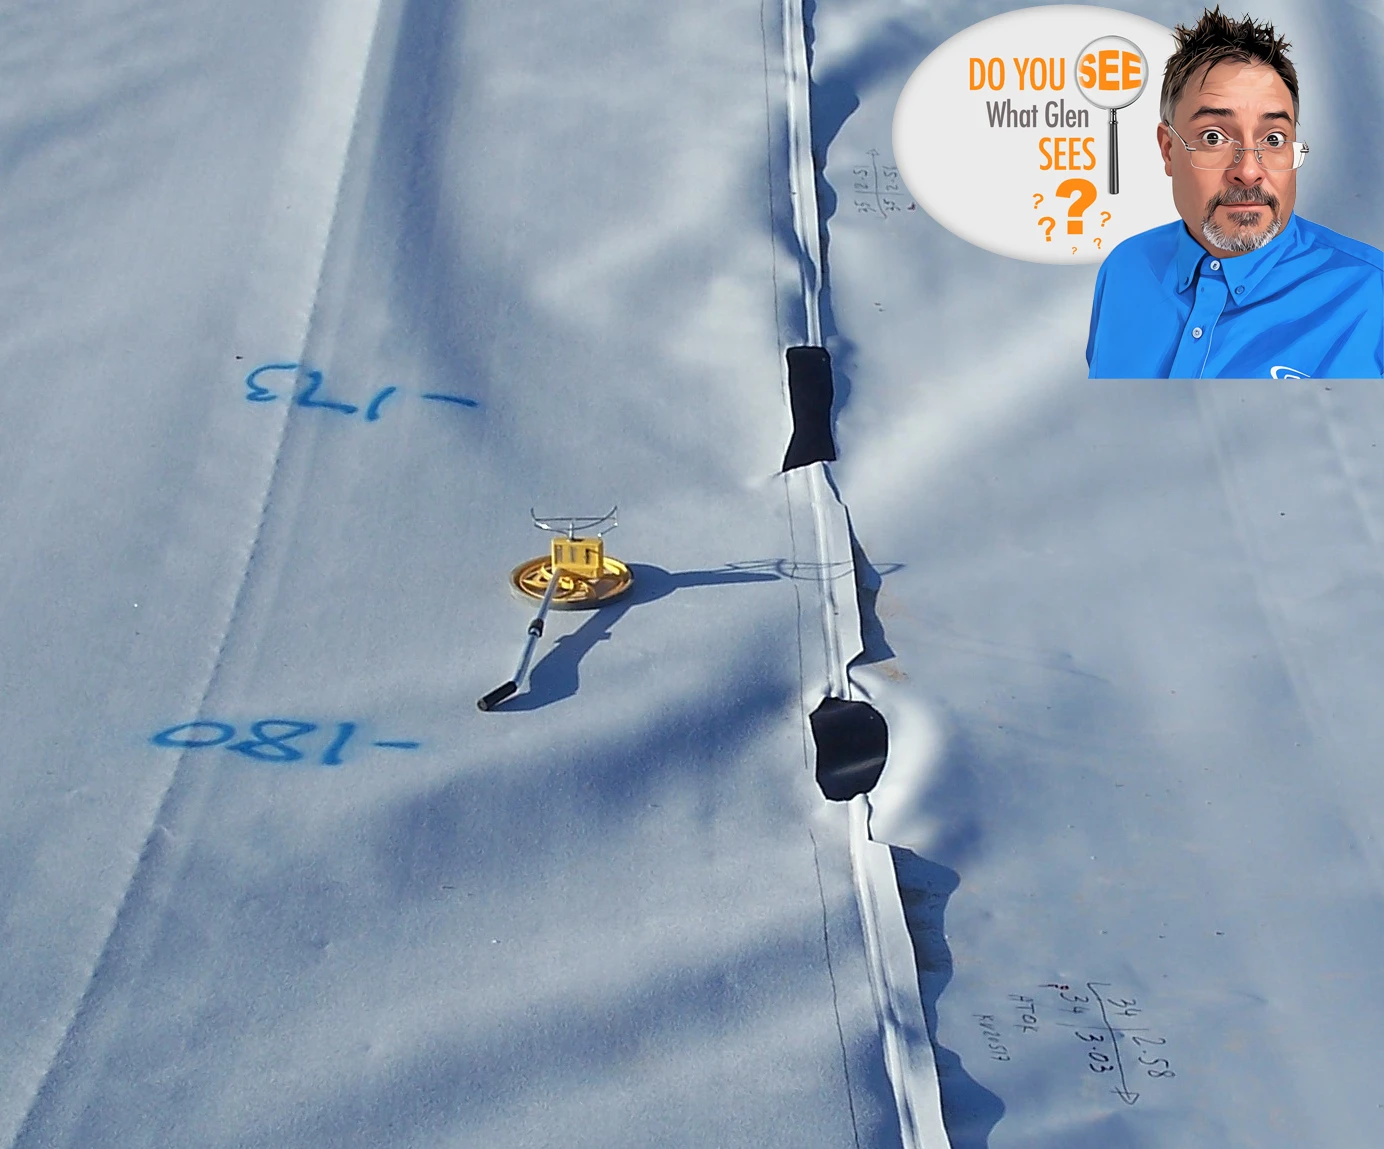
- The gap between the two holes (both were burnouts which were cut out) in the liner has not been air tested. The QC should have marked this area to be capped, same with QA who was observing the air pressure tests. I’m getting set to do that at the time of this photo and assign a repair number. Unless marked prior to repair, these gaps often go unrepaired. It’s also critical to note that on your repair log to ensure the proper repair has been performed.
- The holes in the liner should be rounded such that no straight-line/corners exist because under stress they can propagate beyond an extrusion patch as Mike pointed out.
- Excessive pressure in the wedge weld. It is very likely that I marked a destruct adjacent to one of these holes. I likely took this photo during my preliminary walk of the seams prior to marking destructive samples.
- The black liner in the holes has been heat-tacked as a temporary repair.
- The date of the APT is missing. The information “KV 20517” is the technician’s employee ID.
- The QA has initialed the test as indicated by the red marked at the corner of the APT information.
- The wheel laying on the geomembrane is the one I was using. I always lay the wheel down so that it doesn’t blow down and damage the liner. Had that happen once – never again because as QA, we shouldn’t be damaging geosynthetics. The blue paint are measurements by the QC. I haven’t measured yet for my records – we likely have a grid already marked on the liner from which I’ll take my measurements and write on the geomembrane and record in my repair log.
- The manufacturing crease as Attila pointed out is pointing upwards indicating proper panel orientation (top and bottom sides). As Attila pointed out, there is some type of repetitive pimple looking feature on the crease. Anything that looks out of the ordinary should be investigated, which was done extensively on this project due to occasional manufacturing defects on both smooth and textured materials. This particular feature was common on all textured sheet manufacturing creases and was found to pose no issue based on laboratory testing.
In these blog posts, Do You See What Glen Sees, I will present a photograph or short video related to earthwork or geosynthetics construction and have you identify the significance of what you’re seeing.
It could be things being done correctly or incorrectly. Primarily, these will be things that impact quality.
In addition to my blog, I’ll post this content on X and LinkedIn. You can post your response on one of those two.
I’ll give you my thoughts on each photo or video when I post the next installment.
Do you see what I see? Or did you find something I missed? I’m excited to find out!

Here is the next installment. Take a good look. Do You See What Glen Sees?
Welcome to volume 19 of Do You See What Glen Sees! I hope you’re enjoying these as much as I am!
It is hard to believe it is already the end of May and the 19th volume of Do You See What Glen Sees! Also, the end of the 10-days of date Palindrome. And, a month from now, the sun in the northern hemisphere will already be headed south, marking a decrease in the amount of daylight we see each day until December.
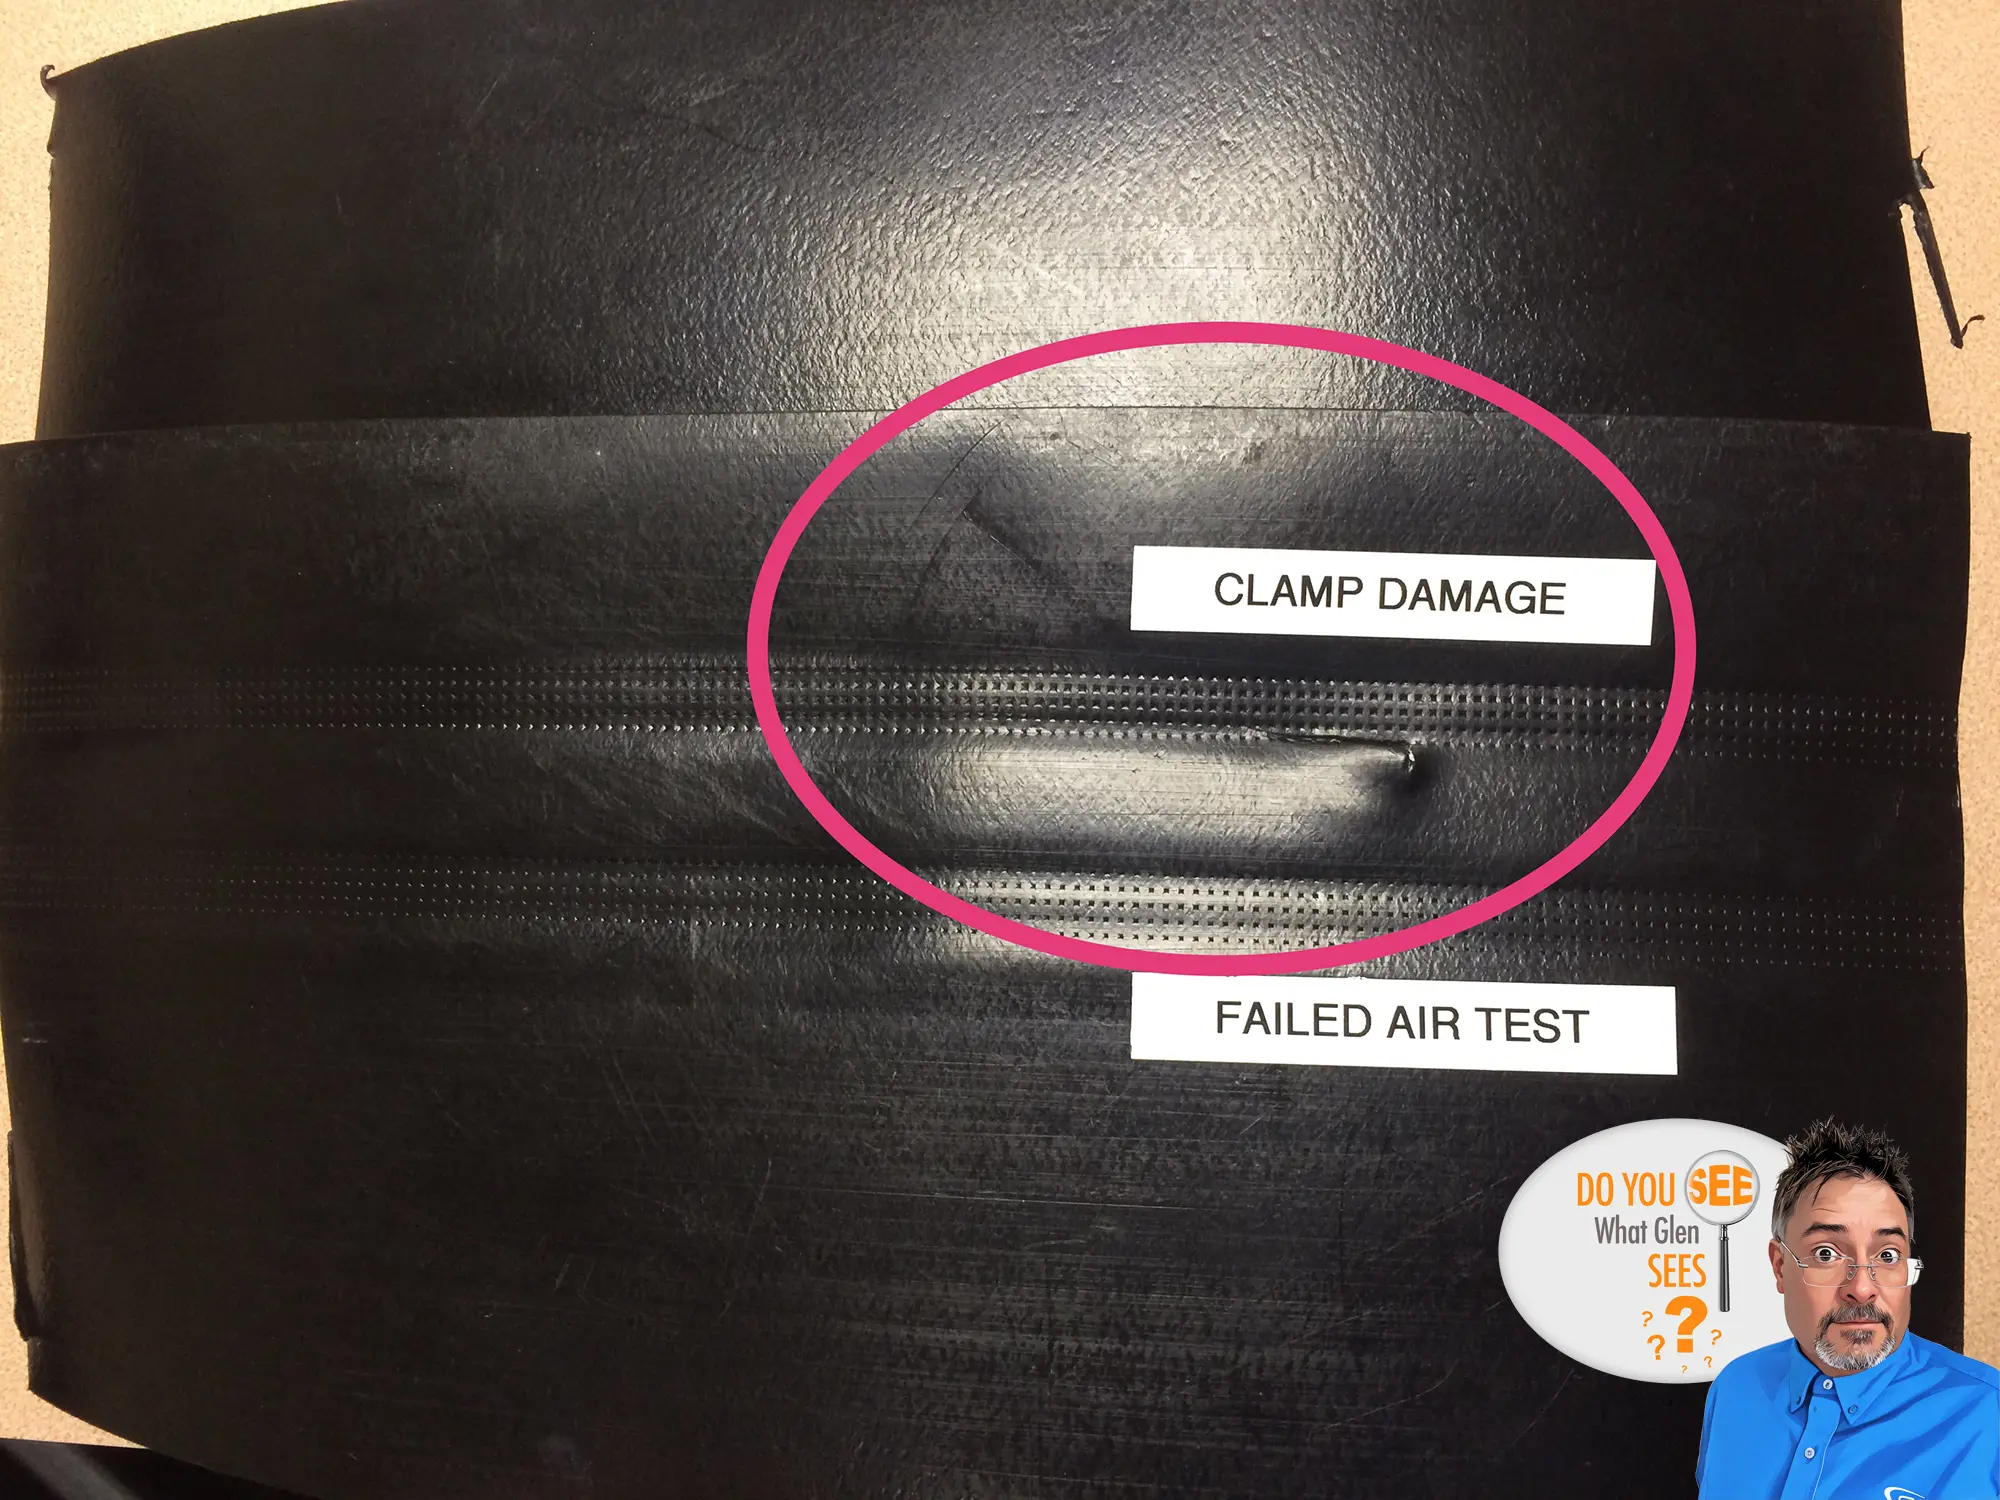
The answer for this one is already provided! Clamp damage during deployment resulting in a failed air pressure test.
So, for this week, here is my multi-part challenge: A) Can you guess how many additional repairs this clamp damage resulted in? B) How much time was spent by the QC trying to isolate and locate this leak?
Good luck!
Let me know what you see!
Post your response on X or LinkedIn.