First, the answer to Vol. 30 (last week).
Thank you for playing along on this one! There are a couple things that I wanted to point out here.
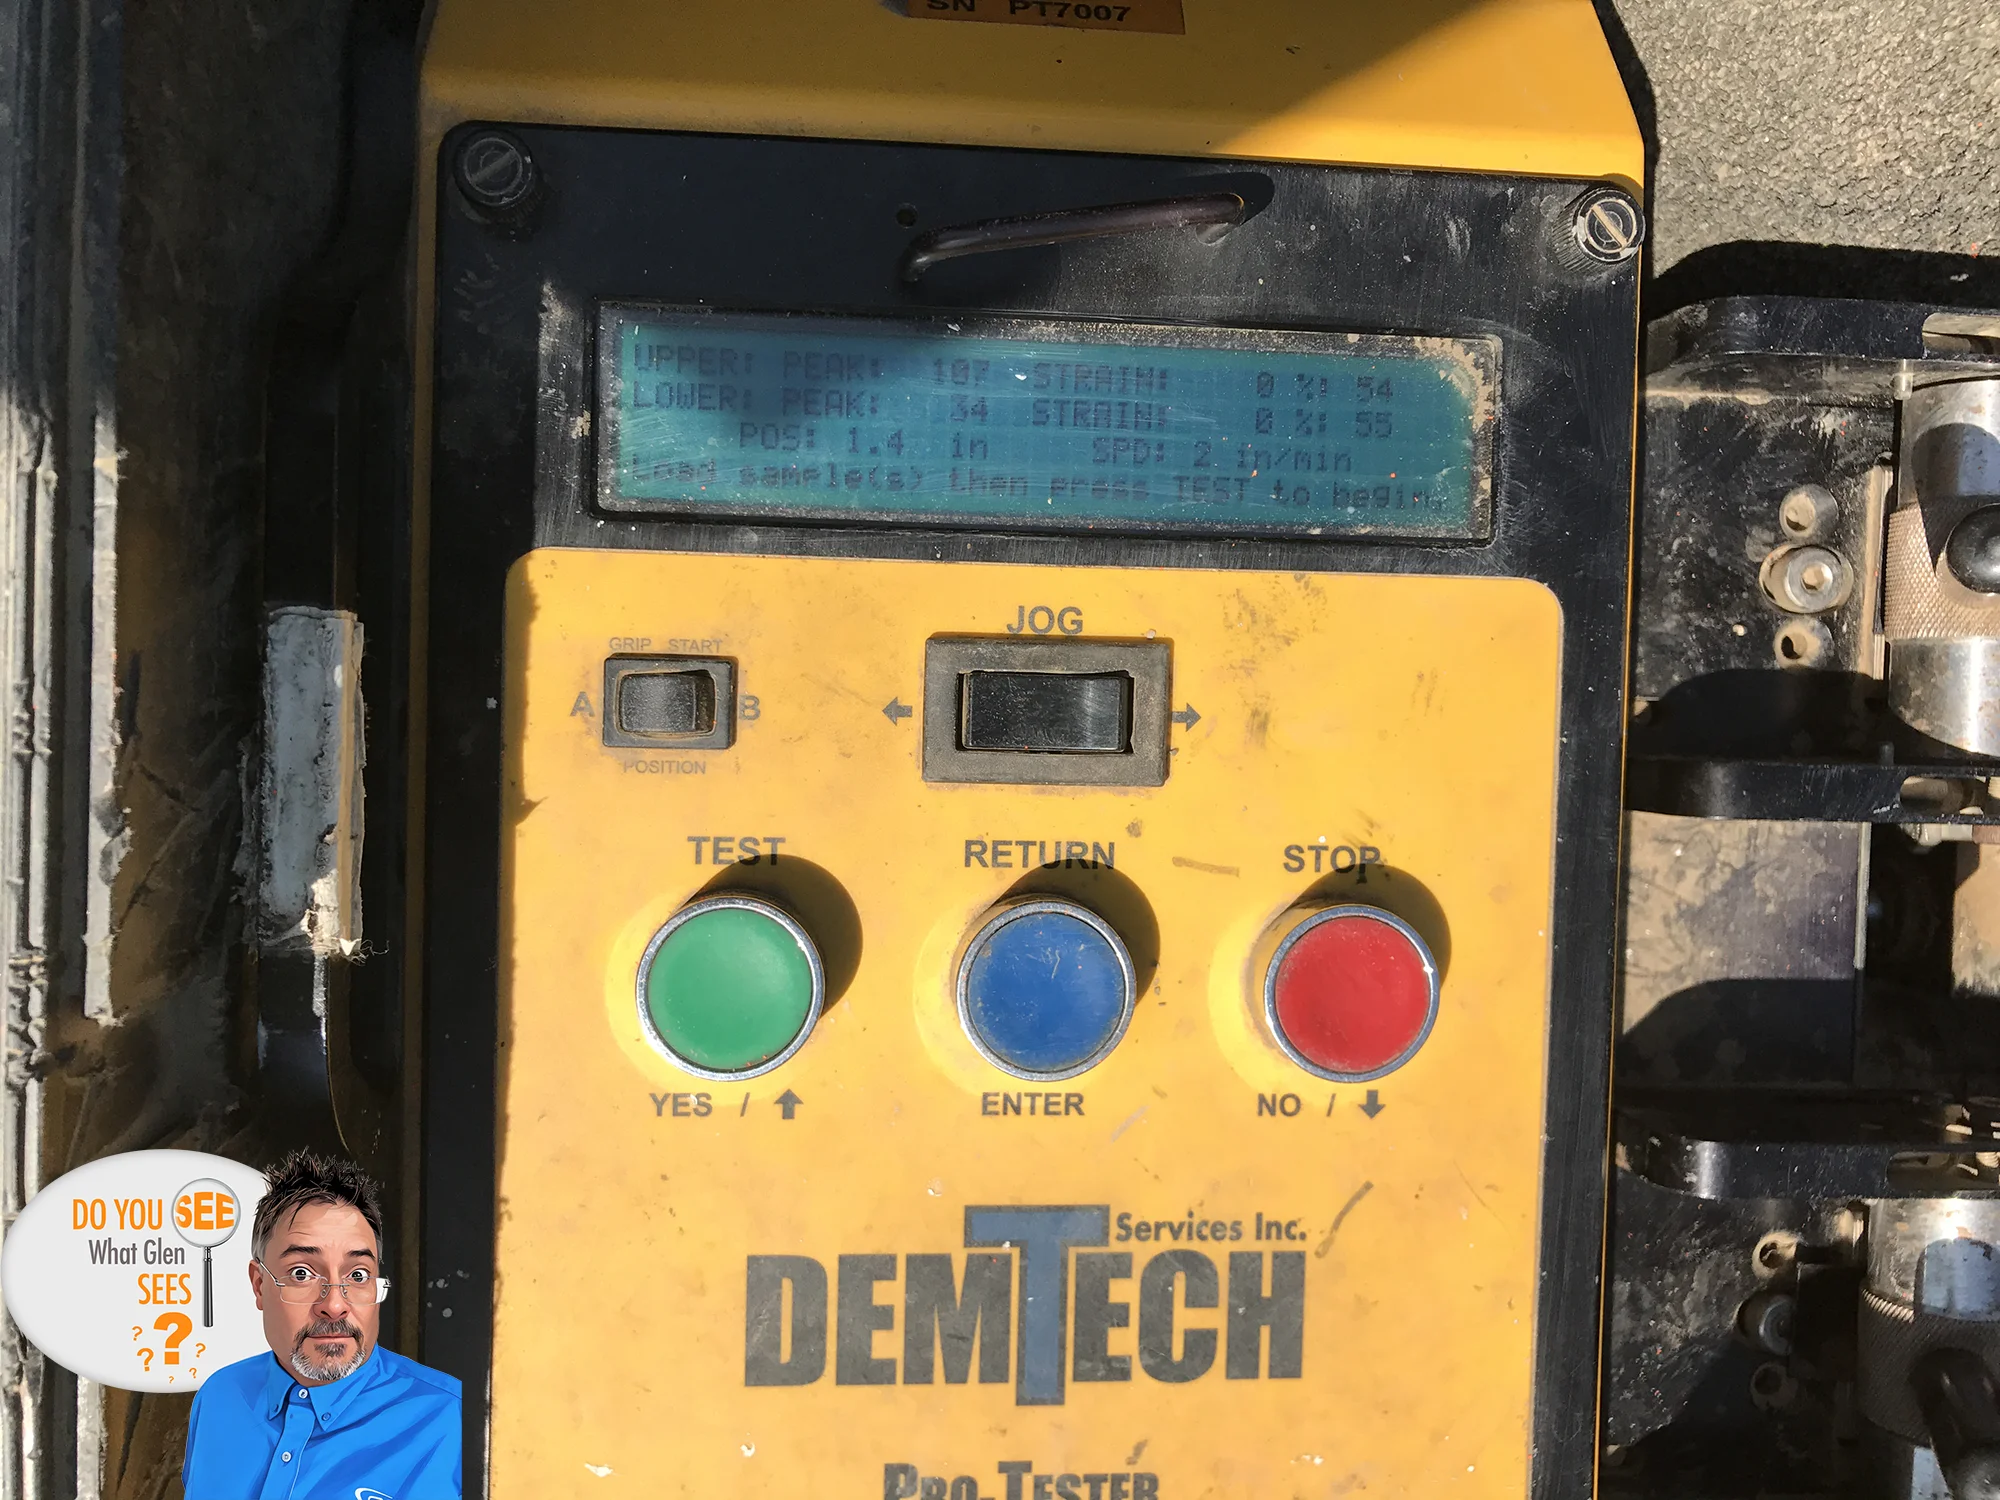
First and foremost, this wasn’t intended as a trick question, but I realized Brian’s comment is correct – context is missing, and critical decision-making context at that! The coupon width is missing and therefore the values are useless without this context. The strength required by GRI-GM19a, Table 1(a) for 60-mil HDPE is 91 pounds/inch (lb/in). But the display is only showing pounds (more on this in a moment). Without this context, the upper coupon appears to meet the minimum strength requirement; however, if the coupon is not 1 inch wide, but say 1.25 inches wide, the coupon would fail (107 lb/1.25 in = 86 lb/in). Likewise, if the bottom coupon was only 0.3 inches wide (I’ve seen this when a coupon-cutter is not available), it would pass (34 lb/0.3 in = 113 lb/in). So, the correct answer really should be that you cannot decide based on the lack of context.
When I chose the photo, I forgot to mention in my write-up that the coupon width was 1 inch. With this being the case, as Marcos mentioned, the test does fail because the lower value of 34 is well below the 91 lb/in required by GRI-GM19a Table 1(a) for 60 mil HDPE. Even though the upper value is above the minimum requirement, the sample will fail due to the one coupon failure regardless of whether it is a trial weld or a destructive seam sample test.
Back to the tensiometer measurement. I never really realized this until looking at this photo, but the screen does not show the units of measurement for the strength reading. The units displayed are pounds and you can switch between units in the control panel – it is always important to double-check the units, and especially the testing speed which often does not get switched appropriately from project to project.
Sixth, Marcos correctly pointed out that the seam/applied bentonite is exposed to weather elements such as wind until the overlap panel is positioned over the bentonite. I like to make sure every seam is inspected by CQA prior to the installer flipping the overlap back – I also spot check completed seams to make sure they haven’t been disturbed in the overlap process (it happens!) which requires coordination with the installer such that the panel can be flipped back as soon as possible. This is an important consideration not often mentioned and on windy days, dispersed bentonite can become an issue. I’ve seen the overlap flaps blow back and all bentonite blown away. The installer and CQA team need to keep an eye on the weather and adjust accordingly!
In these blog posts, Do You See What Glen Sees, I will present a photograph or short video related to earthwork or geosynthetics construction and have you identify the significance of what you’re seeing.
It could be things being done correctly or incorrectly. Primarily, these will be things that impact quality.
In addition to my blog, I’ll post this content on X and LinkedIn. You can post your response on one of those two.
I’ll give you my thoughts on each photo or video when I post the next installment.
Do you see what I see? Or did you find something I missed? I’m excited to find out!

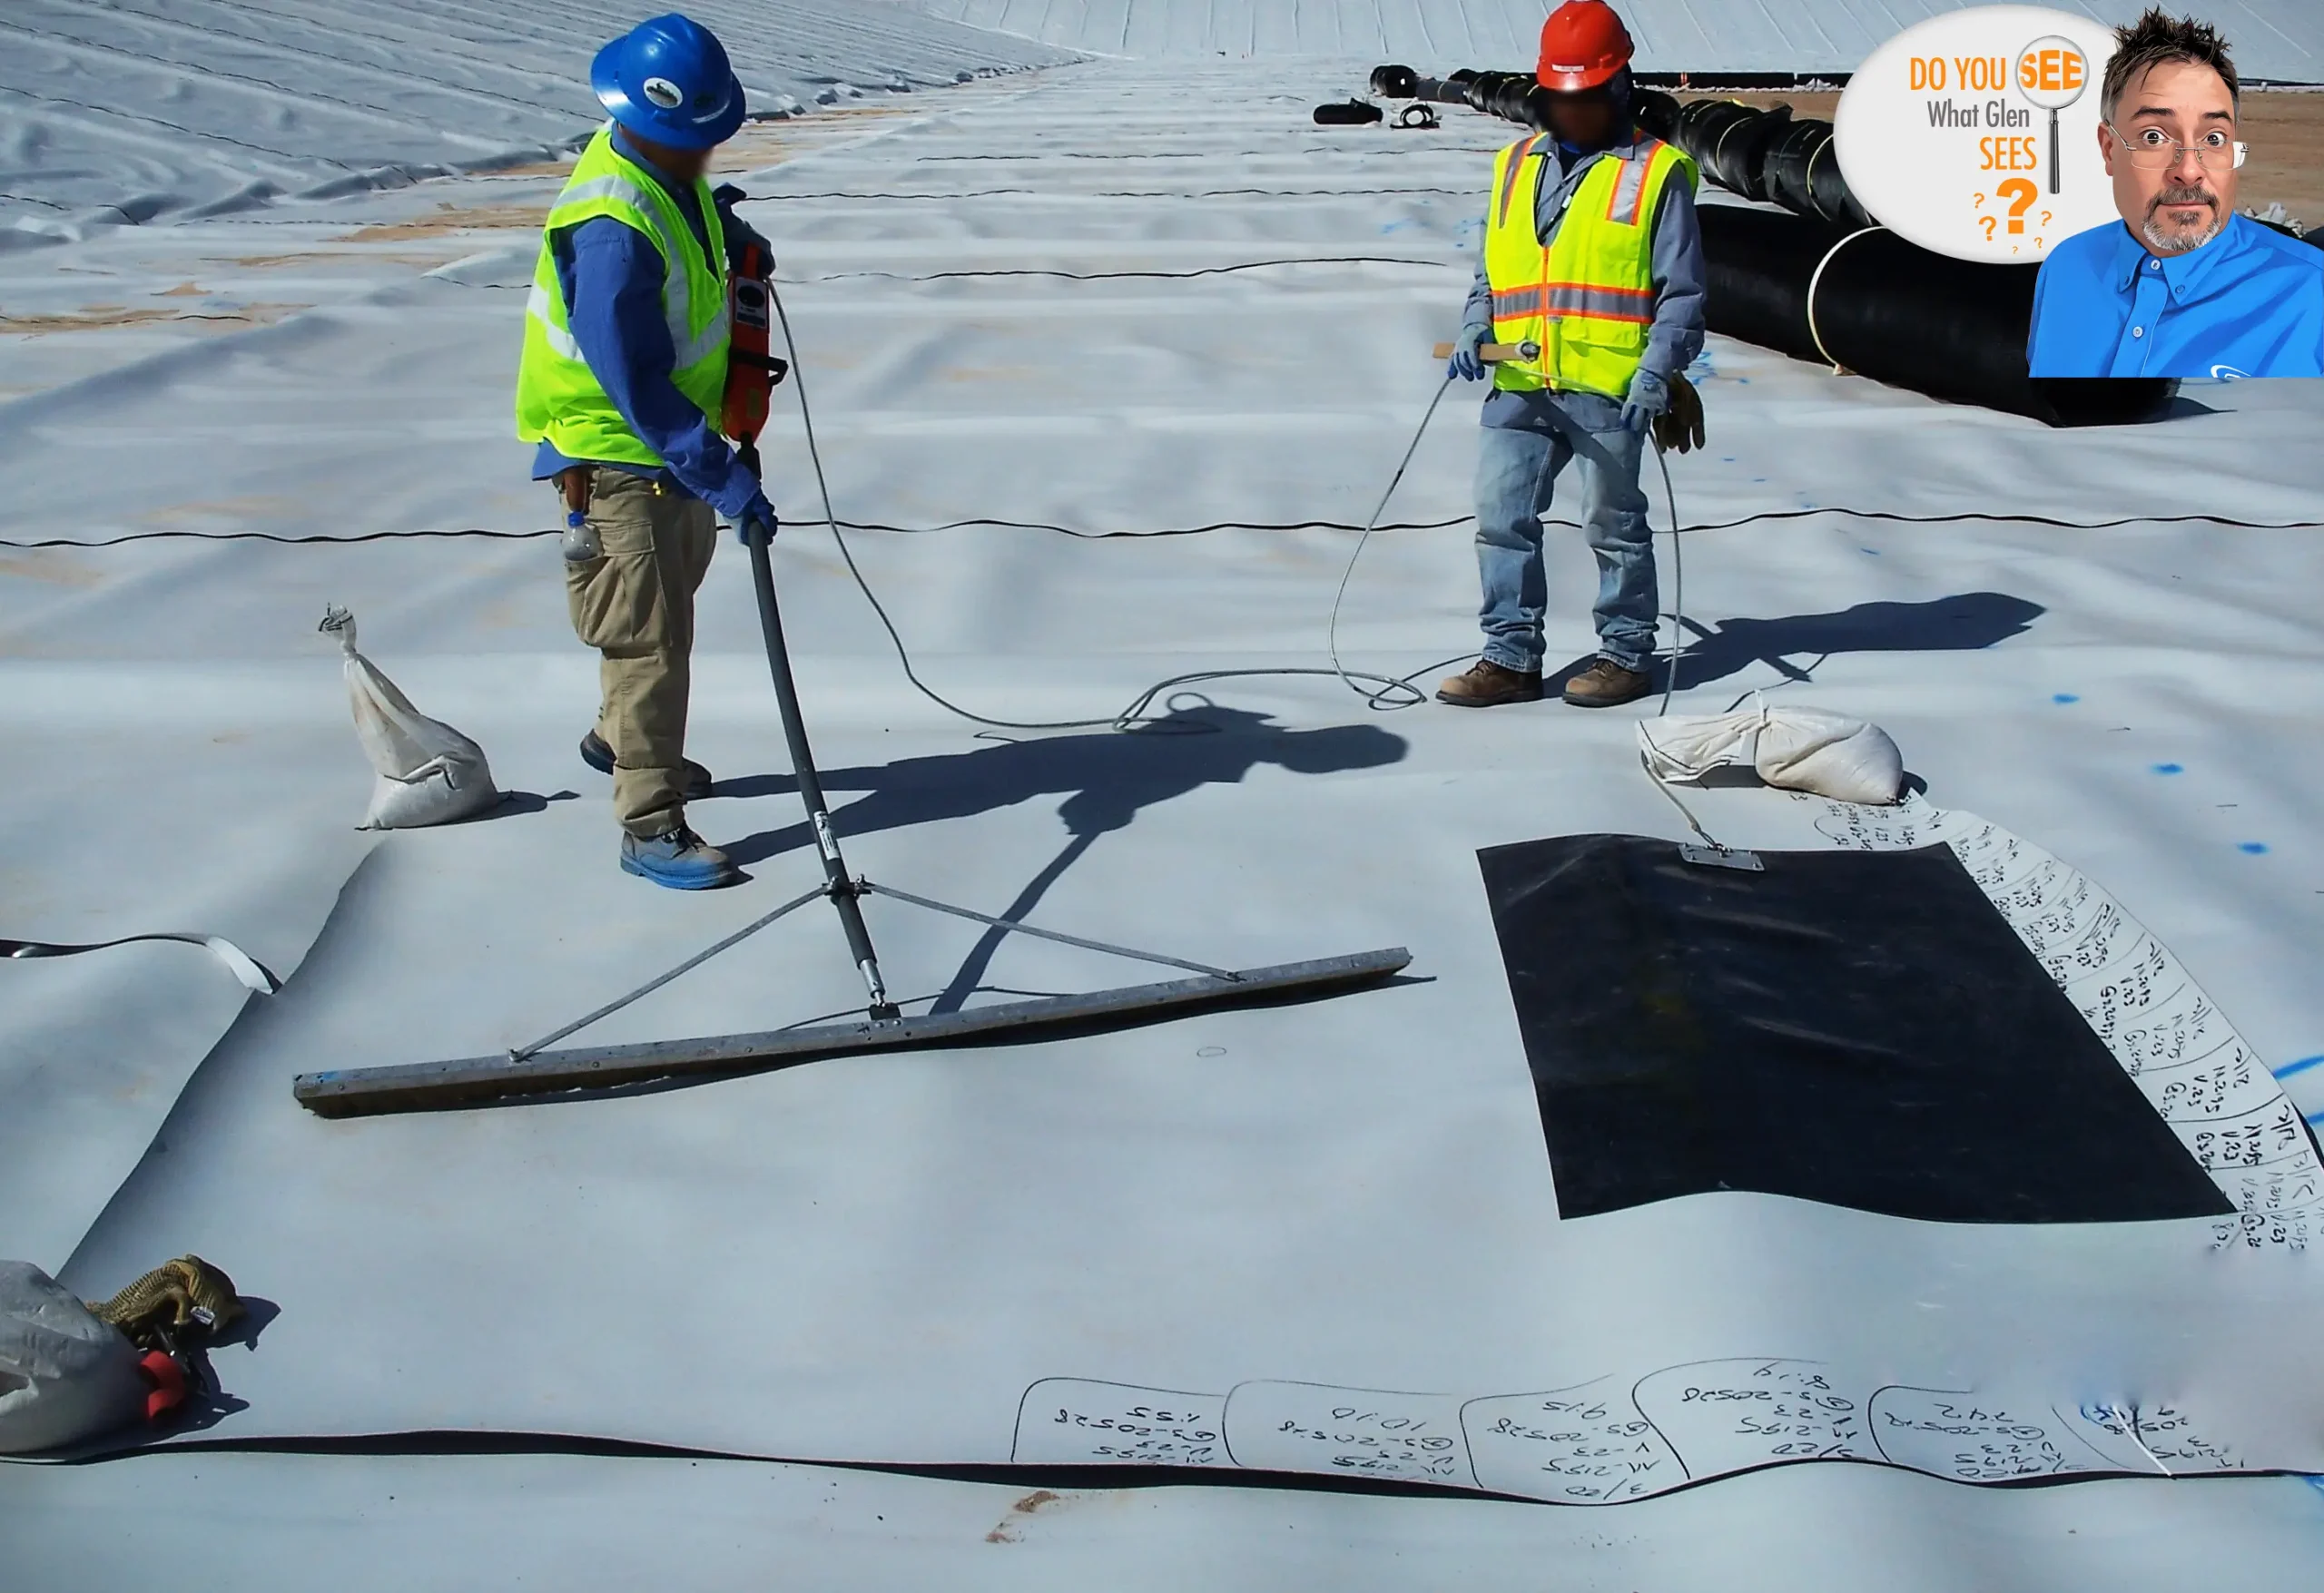
Here is the next installment. Take a good look. Do You See What Glen Sees?
Welcome to Volume 31 of Do You See What Glen Sees?!
When I chose this photo, it was for a sole purpose from a lesson learned on-site from the activity being performed here. But as I look around, there definitely are more things that are worthy of discussion – some even being other lessons learned from the same project. Some good, some have the potential to not be so good.
A hint regarding the main reason I chose this photograph – the crew often performed this activity in the same exact area every day.
Tell me what you see!
Post your response on X or LinkedIn.